The following is an example of the setting for ECCS2106 (the setting is different from the MailHosting service).
The initial condition of the ECCS terminal does not have a shortcut for Outlook 2016, so please start Outlook 2016 from the start button.
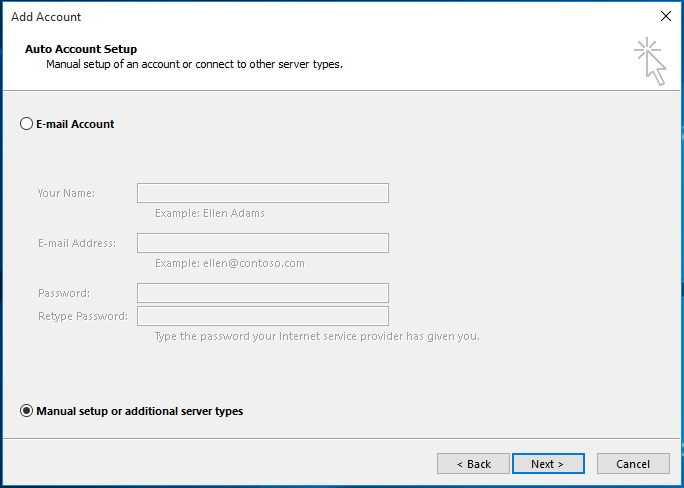
Once Outlook 2016 has started, please click on the "Add Account" button in the Info section of the File tab. When the Auto Account Setup window appears on the screen, please click on the "Manual setup or additional server types" as shown in the following image. Note: If Auto Setting is selected, the setting of the password may be omitted. Therefore, please select the "Manual setup or additional server types".
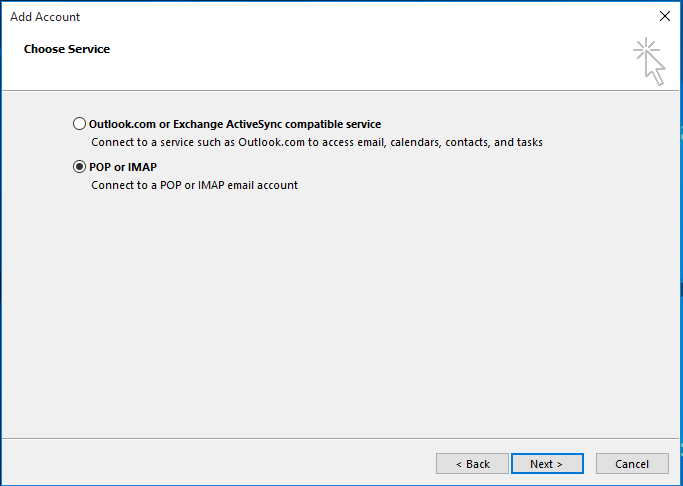
When the screen changes to the "Choose Service" window, please select "POP or IMAP" and then click on the "Next" button.
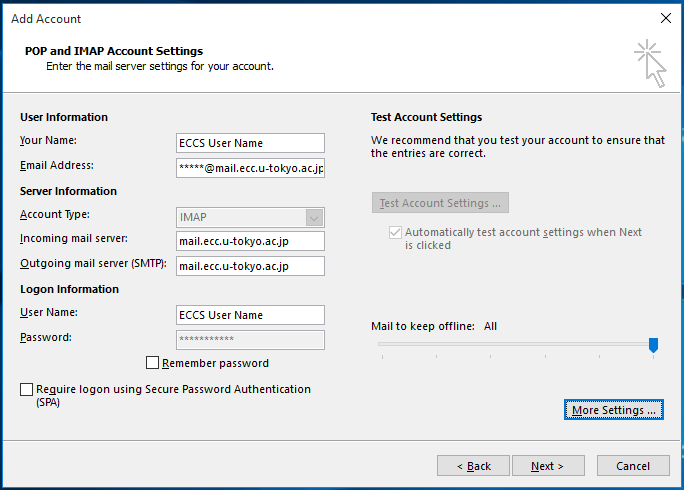
Type in the information as shown in the below image, and click on the “More Settings…” button.
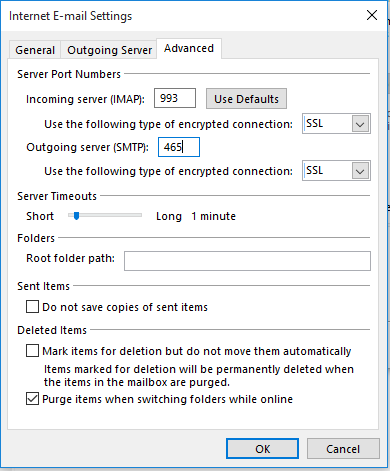
When the “Internet E-mail Settings” window appears, please set up your account following the next steps.
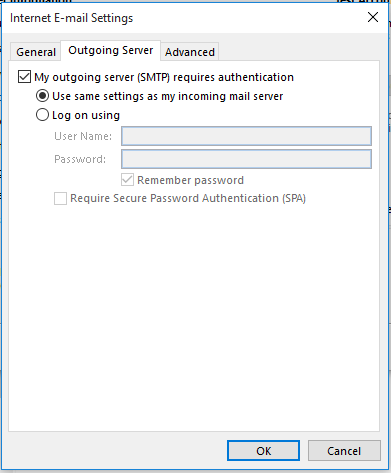
If you need to change any other sections, please enter your own data, then click the “OK” button.
After you complete the setup and the window has return to the first page, please click the “Next” button.
If the password is requested to confirm your account, please enter your password.
Click on the “Yes” button, and Outlook will test the connection settings.
Set up is complete when you see the message informing you of a successful testing.
