【利用者向け】迷惑メール隔離リストの対処方法
FAQ: よくある質問
更新: 2017年08月29日
作成: 2017年08月29日
English version is here.
概要
MailSuiteがスパムと判定したメールはメールボックスの「spam」フォルダに隔離されます。隔離されますと1日に2回 04:00 と 16:00 に最新のメールのリストが送られてきます。リストを確認して判定ミスと思われるメールがある場合は、本文中にあるURLからブラウザでMailSuiteにアクセスして詳細を確認してください。隔離されたメール本文を確認することができます。判定ミスと確認できましたら次項に進み、救済や受信許可を行ってください。
- 隔離されたメールがない場合はリストは送られてきません。
- 隔離されたメールの保存期間は60日です。60日経過したメールは 01:00 に削除され、以降確認することができません。
- 教育用計算機システムをご利用の方は、迷惑メール隔離リストのメールの差出人が「ecc-support [at] ecc.u-tokyo.ac.jp」となります。
- MailHosting D をご利用の方は、迷惑メール隔離リストのメールの差出人は「admin@ドメイン名」となります。ドメイン名はご利用のメールアドレスのドメイン名と同じです。差出人はドメイン管理者が変更することがあります。
Web Mailにログインし「SPAM」フォルダを参照することで、リストの送信を待たずに隔離されたすべてのメールを確認でき、救済等の対処がいつでもできます。
迷惑メール隔離リストの確認
- 受信した迷惑メール隔離リスト(件名: Spam List [YYYY/MM/DD])のメールにある、「YYYY/MM/DD 日のSPAMメールリストです。」のリンクをクリックする。
※認証の必要はありません。
- ブラウザが開き隔離されているメールが表示されるので、スパムであるかどうかを確認する。
- 判定ミスと確認した場合は「救済」または「許可」をクリックし次項に進む。
※ 隔離されているメールが日付順に一覧表示される。
※ 同じメールに復旧と例外処理を行う場合は "例外処理から行う" こと。
- 救済とは、隔離されたメールをメールボックスの受信フォルダに移動すること。次回も隔離される可能性がある。
- 受信許可(ホワイトリスト)とは、次回から、指定(指定方法は次々項の「受信許可」で行う。)した条件に従い隔離しないこと。
メールの救済
- 救済をクリックすると確認のダイアログが表示される。
- 救済する場合は「OK」をクリックする。救済しない場合は「キャンセル」をクリックする。
受信許可
- 許可をクリックすると「例外処理登録」のダイアログが表示される。
- 「送受信許可(IP)」「送受信許可(Email)」「送受信許可(Domain)」のいずれかを選択して「確認」ボタンをクリックする。
条件指定の内容は以下の通りに許可される。
- 送受信許可(IP): メールを発信したサーバを指定(指定されたサーバからのメールはすべて許可される)メールアドレスのホストとは別であることに注意
- 送受信許可(Email): 送信者を指定
- 送受信許可(Domain): メールアドレスの「@」以下のホストを指定(指定されたホストの送信者のすべて許可される)
Overview
MailSuite quarantines emails marked as SPAM by its AntiSPAM module
into the "spam" folder of your mailbox.
A list of your SPAM emails quarantined by MailSuite
is sent to your address at everyday 4:00 and 16:00.
A URL included in the list enables you to recover the emails you want to read
or to edit your white lists.
- The list is NOT sent if any emails of the user are NOT quarantined.
- Your quarantined emails are held in SPAMBlock within 60 days and deleted at 1:00 of the day after 60 days.
- For ECCS users: the sender of the list is "ecc-support [at] ecc.u-tokyo.ac.jp".
- For MailHosting D users: the sender of the list is "admin@your.domain.name". The administrator of your domain may change the sender address.
Your quarantined emails are stored in your "SPAM" folder. Whenever you log in to Web Mail, you can see all the emails in that folder.
List of quarantined emails
- A list of quarantined emails, of which subject is "Spam List [YYYY/MM/DD]", includes both a one-time URL and a summary of the emails as follows.
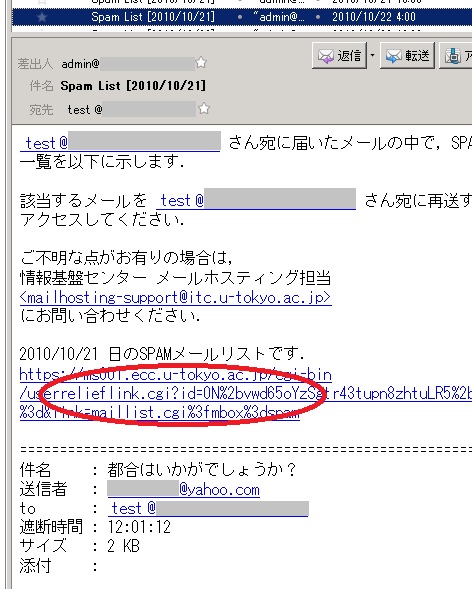
- Open the URL in your browser to see the quarantined emails.

- If you find a non-SPAM email is quarantined, you can click the button labeled "救済" to recover the email or click the button labeled "許可" to edit your white lists.
- "Recover" makes the email delivered to your mailbox for this once.
- "White lists" remember the rules of emails to be never quarantined.
Recover your emails
- Click the button labeled "救済" to open the dialogue as follows.
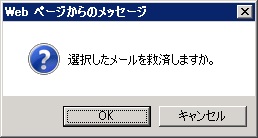
- Click "OK" button to recover the email or the button labeled "キャンセル" to cancel this action.
White lists
- Click the button labeled "許可" to open the dialogue as follows.

- The first of three radio buttons means "add the IP address to your white list". The second is "add the sender address to your white list". The third is "add the domain to your white list". Choose one of them and click the button labeled "確認" to add the choice to your white list, or click the button labeled "閉じる" to cancel this action.
- IP address based white list accepts any emails sent from the IP address. The quarantined email was sent from the IP address shown in the dialogue.
- Email address based white list accepts any emails just with the sender email address.
- Domain based white list accepts any emails with any sender addresses of the domain.